
Datacolor Spyder 5 Elite Software Download
Datacolor Spyder 5 Pro review
The new Datacolor Spyder5 colorimeter is a pocket-sized USB device that can precisely measure the color response of your LCD screen. By comparing the actual displayed response of known color values, it can create a colour contour that is used by the operating organization and any color managed awarding to show correct colors. This process transforms your LCD from an unknown variable into a standard reference and tin greatly improve your screen'due south epitome quality by improving tonal response and shadow detail.
Cameratico is reader-supported through chapter links. As an Amazon Acquaintance I earn from qualifying purchases.
Update: Datacolor SpyderX launched
The Datacolor Spyder5 was replaced by the SpyderX model which is now sold at the same price bespeak and has both Pro and Elite versions, similar its predecessor. It is a much better device and I don't recommend buying a Spyder5 at this point.
Read my in-depth Datacolor SpyderX review.
Why calibrate your brandish
Everyone who interacts with colour should work on a properly calibrated display. Menstruum.
Your display is the starting bespeak of your digital darkroom. It'due south the only interaction betwixt photographer and the image subsequently its inception on the camera. An uncalibrated screen is an unknown variable. Your images or designs tin vary wildly on colour from i display to another, and fifty-fifty more during printing, where any misstep can represent a large waste matter of money. Calibrating your display ensures that what you meet is consistent from day to day and also follows a known standard. The same logic applies not only for photographers, but also for users in other fields that require consistent color — for instance, spider web, graphic and product design.
The resulting color profile is used by your operating system and any color managed program to accommodate its output, making sure that what you see is as like as possible to other displays, given their intrinsic differences. These profiles are besides used to match colors between other colour managed devices. For example, if you have custom color profiles for your LCD display and photograph printer, Adobe Lightroom can understand their differences and friction match their output as closely as possible, or simulate the printer output on your screen.
How to choose the all-time monitor for photograph editing: what specs really matter.
Hardware design
Datacolor has been improving their sensor pattern for more a decade. I've used all versions of it, from the original Spyder, dorsum when the visitor was however called Colorvision, to this latest 5th generation. I capeesh the fact that they move fast and mind closely to the marketplace demands. The Spyder3, for example, was the first consumer class colorimeter that worked fine with wide gamut displays. Spyder4 focused on measurement precision and less unit-to-unit variance.
One of the biggest criticisms of the Spyder3 and Spyder4 colorimeters was that measurement performance was not then corking on the darker tones. The updated Spyder5 sensor features a new 7-colour matrix that is claimed to offer upwards to 55% comeback in tonal response, especially in the shadows. The comeback is very apparent when y'all compare information technology to previous versions and too reflects in a faster calibration fourth dimension, since the updated unit of measurement can get a precise measurement in less time than its predecessors. Profiles generated with the new Spyder5 sensor take a piffling bit more than shadow detail and less banding, comparison favorably to the 10-Rite i1Display Pro, which is arguably one of the best on the market.
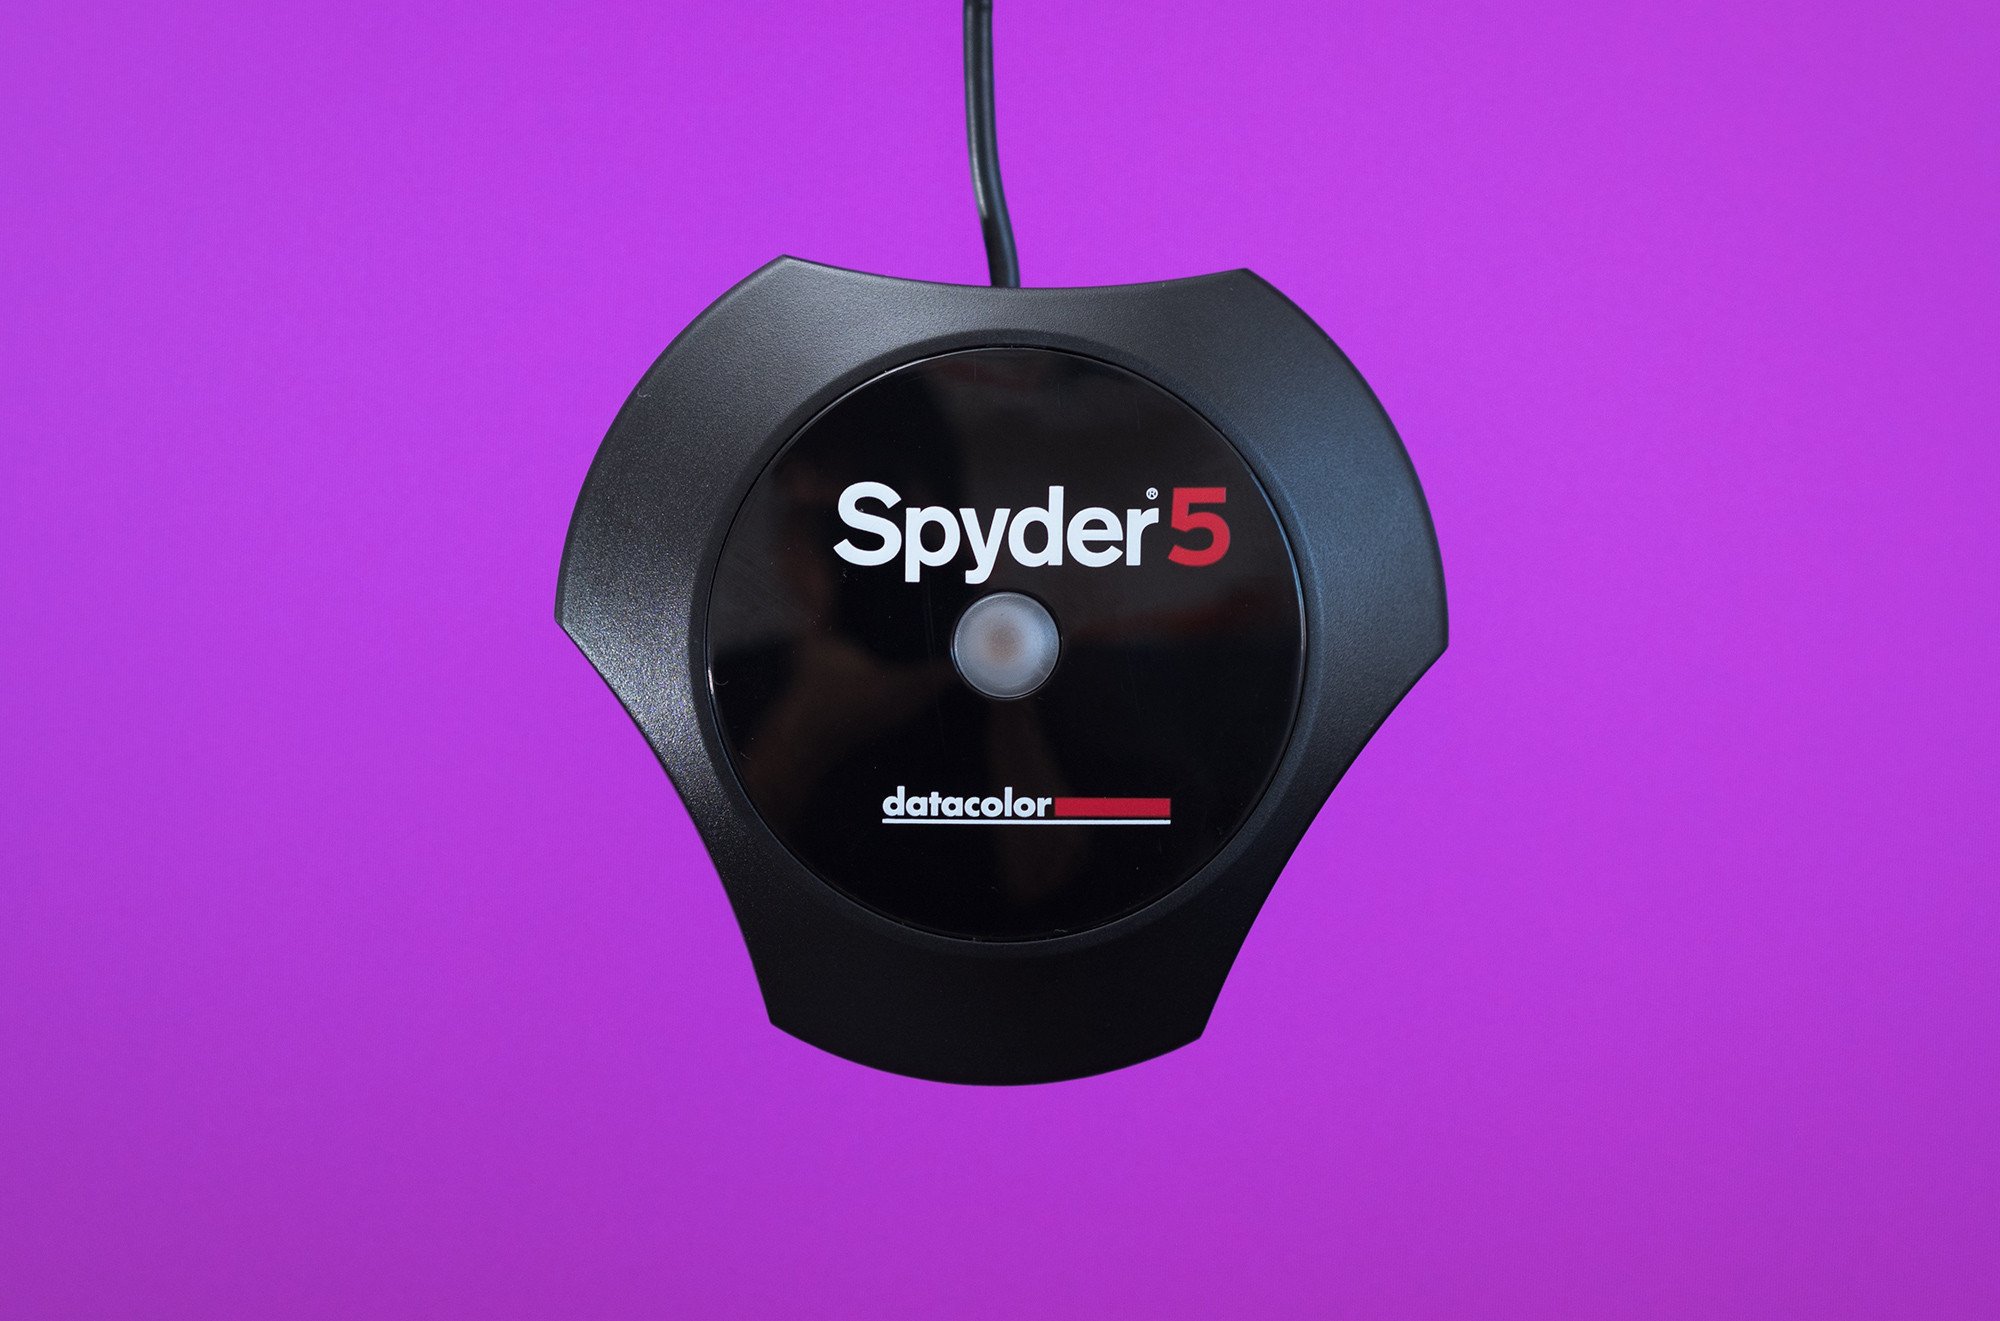
The colorimeter now has a more than compact design with an integrated protective cap that doubles equally a counterweight. When closed, this cap protects the color filters inside the unit from overexposure to light, which tin can degrade them and lessen the unit's accurateness. This was a very common problem, for example, with the old X-Rite Eye One Display 2 and other colorimeters of that generation.
This updated design is elegant, compact and works well. What I didn't like in my testing is that the cap/counterweight fits very snugly on the USB cable, and you lot take to pull it with more forcefulness than I'yard comfortable with in order to adapt its position. My fearfulness is that doing this multiple times tin cause the cable to neglect. In the end I opted to leave a reasonable loop of cable betwixt the cap and the main unit so I don't have to arrange it every time.
The new sensor likewise has an updated bamboozle design that uses a deeper honeycomb pattern in order to eliminate any stray lite influence on the measurements. It works very well, with no discernible changes in measurements fifty-fifty when pointing a vivid LED flashlight directly to the sensor.
Spyder v Express vs. Spyder 5 Pro vs. Spyder five Elite — Choose the best version for your needs
All three versions share the same sensor and produce color profiles of identical quality. The least expensive Express version lacks ambient light measurement, which is a feature of express use, in my opinion.
Other than this, all differences between the three packages lie in the software, which is intentionally capped on the lesser models. This makes the Spyder5Express a neat deal if yous tin can live with its software limitations and the lack of ambient lite measurement. Proceed in mind that some of those actress features, especially in the Elite version, are of very express real world utility.
You tin can find here a detailed table with all differences betwixt the versions.
Spyder5 Express
This is the absolute best display calibrator you can purchase for a depression price, especially if paired with the open source dispcalGUI and Argyll CMS package. Original software offers only one color temperature and gamma option: 6500K and two.2. Non coincidentally, this is the most used setting and should work well for the bulk of users, including those working with design and photography. Ambience light sensor is present, merely disabled, and in that location's no recalibration selection, so yous have to perform a total calibration every time (about 5 minutes vs. two.5 minutes).
Spyder5 Pro
The Spyder5Pro version is the most well rounded parcel. It offers the well-nigh popular choices for color temperature — 5000K, 5800K, 6500K, native and gamma one.viii, 2.0, 2.2, 2.iv. Ambient light measurement and a quick recalibration option are as well available.
Compare with X-Rite Colormunki Display.
Spyder5 Elite
The top of the range Elite version adds features more suited to the hardcore color geek and edge cases. Datacolor tries to add value to this version by calculation lots of features that are, in my opinion, useful for only a small subset of users. What really matters is:
- Front projector scale
- Custom calibration targets for video professionals, such as NTSC, PAL/SECAM, ITU-R Rec.BT.709, ITU-R Rec.BT.2020, Cineon and L-Star*
- StudioMatch, which allows you to tweak the profiles to match multiple displays connected to the same computer
Cross shop this version with the X-Rite i1Display Pro.
And so which version should I buy?
- Spyder5Express if you want to stick to 6500K and gamma two.2 or employ with dispcalGUI and Argyll CMS.
- Spyder5Pro is perfect for most users and worth the price difference if you don't want to endeavour third party software.
- Spyde5Elite if yous demand to tweak multiple connected displays or piece of work with video content that requires calibration to an industry standard, similar NTSC.
Calibrating your display with Spyder5
Datacolor Spyder5 works on both Mac (OS X versions 10.7 to x.x) and Windows (versions 7, 8 and 8.1) computers. All platforms, including Linux, can utilize the complimentary dispcalGUI and Argyll CMS open up source package.
Software download and installation is straightforward, only requires net access to generate an activation code that ties the hardware serial number to the software. I assume this was done to limit piracy, since the only difference between the cheapest Express and the Elite versions is software.
Spyder5 software is wizard based and intelligent enough to show and hibernate functions depending on your display type. For example, if you choose laptop on the setup screen, it knows that you just have brightness controls available. Some display types are besides detected automatically. For example, current Apple laptops all accept white LED backlight, so the software doesn't demand whatsoever user input to select it. In the same sense, using room light adjustment is recommended only for desktop users.
All screens have an interactive assist sidebar. Take your time to read it. It's adept information even for savvy colour management users. At that place's also a "click to learn more" link with more in-depth explanations about each step.
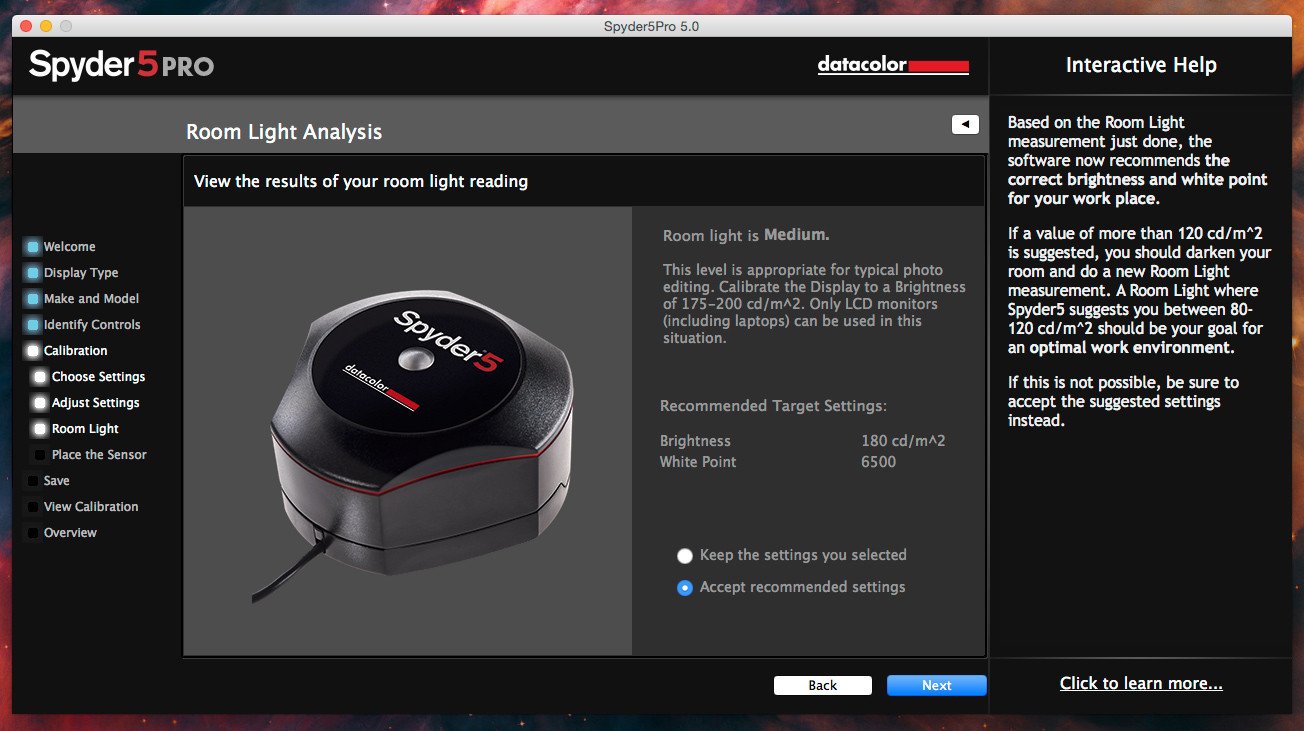
Room light measurement screen.
Ambient low-cal sensor and why I don't use it
The ambient calorie-free sensor helps users to evaluate their room light conditions and recommend the most acceptable display profiling settings for those atmospheric condition. This is washed only in one case, during scale, and doesn't alter the resulting profile in any mode afterward. If the sensor is connected to the computer, the Spyder Utility programme can alert you about any ambient low-cal changes so you can generate an updated contour.
In my beginning run, the software suggested using a 180 cd/m2 effulgence based on my room light conditions, which is a very high brightness value for color critical work. This was at evening and with a 120w incandescent fixture on the ceiling. The software warns about making certain no intense low-cal is falling directly on the sensor, merely I experience that it is too sensitive. With the sensor placed on my desk-bound, low-cal coming from the display could also affect readings. After pointing it abroad from the display and the master room light, I got a more reasonable proffer of 120 cd/m2. White point varied between 5800K and 6500K, depending on the placement of the sensor. 5800K is likewise warm for virtually uses, and I'd recommend that you ignore the suggested settings and maybe ambient light measurement altogether.
The beginning stride in the calibration wizard is to make certain your screen is fix to be calibrated. Information technology serves as a reminder to warm the screen for 30 minutes, reset the display controls and bank check your lighting conditions.
After selecting your reckoner blazon — laptop or desktop — and brandish type, you lot're prompted to choose your scale settings. This is where all iii versions drift apart. Express only allows y'all to choose 2.2 gamma and 6500K as the scale target. Pro users take more choices and tin can measure out the room lighting conditions. Elite users have nigh countless scale options, including some broadcast video specific targets, like NTSC and Rec BT.709.
If your display has adaptable controls for each RGB color channel, turn on the pick "Prove RGB Sliders option in identify controls screen" in the Advanced Settings section. If non, wait for preset colour temperatures and fix it to the closest value to your target white bespeak, which is unremarkably 6500K.
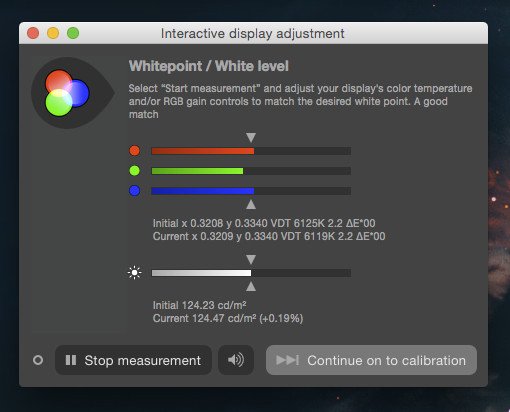
Displays with RGB controls can be adapted to precisely match the target white point.
Next step is the calibration process itself. The sensor should residue flat on the brandish surface with no gaps. Information technology helps to tilt the screen dorsum so it doesn't slide. It's a good idea to dim the room lights a bit or shut any nearby blinds just to make sure no intense stray calorie-free interferes with the sensor. Spyder5 software will flash a serial of color patches on the screen that volition be measured by the colorimeter. Full calibration takes near 5'thirty minutes, while subsequent recalibrations are faster, at approximately 2'l.
Subsequently saving the contour, you can preview the results by examining a standard test image and switching between calibrated and uncalibrated views. Pro and Aristocracy versions permit y'all to choose any image for this comparison, while the Express version is express to the target provided with the software.
Pro and Elite users are presented with a terminal screen to compare the generated contour gamut to known RGB working spaces, like sRGB and AdobeRGB. This is useful to troubleshoot profiles and make certain that the measured gamut volume is within the expectations for that brandish blazon. Those 2 versions also offer a Display Analysis module that tin can assess gamut, tone response, brightness, contrast and white point.
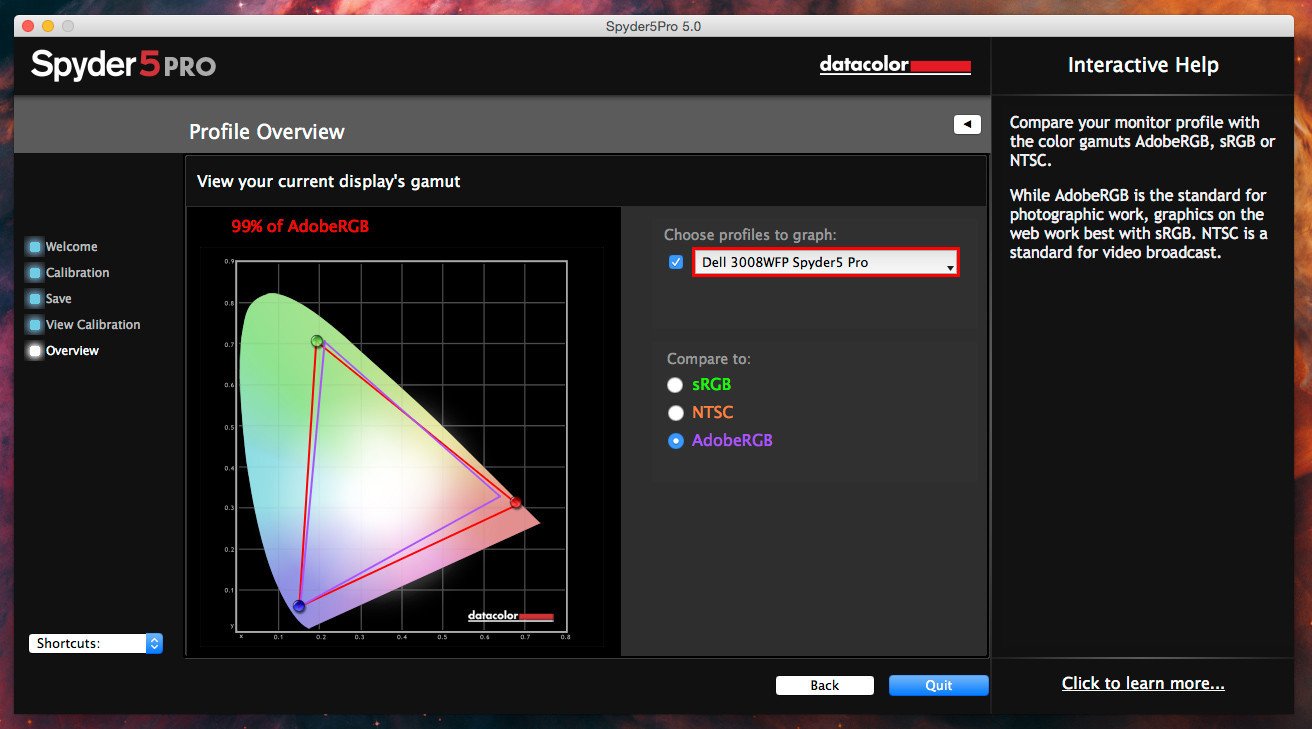
Profile overview screen showing a gamut comparison between the profile created and manufacture standard targets. Pay attention to whatsoever discrepancies in profile volume compared to sRGB and AdobeRGB.
Test results
Spyder5 worked flawlessly with any quality IPS display that I tested.
All ICC profiles showed footling discernible banding on colour gradients, with practiced shadow detail and tonal consistency on the darker values. This is a attestation to the updated sensor quality, since measuring darker colors is more difficult, sometimes leading to color casts in the virtually blackness grays.
My 30ʺ Dell 3008WFP display is a worst case scenario for gray calibration banding. Information technology's an older wide gamut brandish with 8bit internal LUTs that are not directly attainable to the calibration device, unlike high cease LCDs and the newer Dell UltraSharp models. In practice this means that all the calibration work must be washed by the ICC contour itself, manipulating the output of the graphics card earlier it is received past the display.
On that LCD, Spyder5 profiles are almost indistinguishable from those generated using the i1Display Pro, producing slightly harsher transitions in the blues and reds and a tiny bit more banding. The profile generated using the Spyder5 colorimeter has a little bigger gamut book in all areas, except for cyan. In practice those are subtle differences, and I had to look difficult to detect them. Both devices produce excellent profiles that are equal in real world.
A more puzzling difference is that Spyder5 consistently measured white point most 200K lower than i1. This means that displays calibrated with it look slightly libation than with Ten-Rite's bundle. It's hard to judge who's right without access to a reference course spectrophotometer. This difference seems to exist consequent from unit to unit and non caused by any malfunction. Information technology's also software independent, since testing with third party software led to the aforementioned results. 200K is a small difference and didn't affect print matching or overall accurateness.
Calibrating low quality TN displays was a different experience altogether.
This technology is usually institute on cheap LCDs and laptops, including Apple'due south MacBook Air and not-retina MacBook Pro models. TN displays are often 6-bit internally, which leads to severe color banding, especially when calibrated to anything outside their native white point. To brand matters worse, TN displays are ordinarily very blue, pregnant they have a hardware white indicate over 7500K. The final nail in the coffin is that they shift colors depending on the viewing angle.
Calibrating a TN display certainly helps, but doesn't solve any of the problems that are inherent with this technology. The farther away the display is from your target white betoken and color response, the harder the colorimeter and software should work to produce a useable profile.

TN vs. IPS displays: Calibrating TN displays (left) usually yields much steeper calibration curves, leading to banding and poor shadow detail. Skilful IPS displays (right), on the other manus, produce much better results.
The scale curves necessary to right a typical TN display were much steeper than on a quality IPS screen. The result is the aforementioned as when you push button your curves too much in Photoshop, especially in 8 bit color mode: posterization and harsh transitions.
In exercise I've had some actually wacky and all over the place results calibrating low quality displays. Visible banding and colour casts were a common occurrence, specially when I chose a 6500K target white point. When calibrating a 13ʺ MacBook Air, the resulting profile had a really small gamut book, which led to blocked and over saturated colors.
Aiming for a native white point by selecting "Unchanged" on the calibration settings (Pro and Elite versions only) produced more than useable profiles, even though they looked besides blue compared to prints or high quality IPS screens. The downside is that those profiles besides had astringent colour casts on the grayscale. All in all, I even so preferred profiles with a 6500K white balance target.
Those problems are not specific to Spyder5, merely related to the limitations of TN screens. i1Display Pro exhibited the same bad results, but seems to exist more forgiving of lower quality panels and produced better profiles overall. On the other hand, i1Display Pro profiles had a strong carmine cast, while Spyder5 profiles had a more than neutral rendition with a slightly green cast, which gave me a better match to my reference brandish. Alternative software, similar dispcalGUI + Argyll CMS, ColorEyes Pro or basICColor made no difference. I tried them all. TN displays are doomed. :)
Go on in mind that I'm beingness really picky nigh it. The results are certainly better than the uncalibrated displays, but far from good enough for whatever critical piece of work, in my stance. And this holds true for Spyder5 or any other scale device.
In order to isolate sensor and software performance, I repeated the same tests using the excellent dispcalGUI + Argyll CMS package. This is an open up source display calibration software that often gives amend results than the original programs. I highly recommend anyone to try it.
On loftier quality displays, Spyder5 profiles using dispcalGUI + Argyll CMS are almost indistinguishable from those generated using the i1Display Pro with the aforementioned software package. The difference is really small. Grayscales show a petty more banding on the darker tones and that'due south all.
Lower quality TN displays were still plagued by the aforementioned problems I saw when profiling with the original software packages. On the other hand, dispcalGUI + Argyll CMS can give experienced users more control of the results, if you know what to look for.
Keep in listen that this isn't a perfect apples to apples comparison, because Argyll CMS is open source and not necessarily optimized for whatsoever of the devices, as their original software is. Measurement times lag badly behind i1Display Pro, for example, which is the reverse of what happens using the original software.
These results reinforce my conclusion that the new Datacolor sensor is a very high quality device that can compete with any other consumer form solution in the market. I have no reservations recommending it, especially if you pair the lower toll Limited package with dispcalGUI and Argyll CMS.
Spyder5 Elite vs. i1Display Pro
i1 Display Pro costs less than Spyder 5 Elite and is a better package, in my opinion.
Datacolor software feels less buggy than X-Rite'due south i1Profiler. The interface may be older and look dated, simply I appreciate the fact that it doesn't install whatsoever daemon other than Spyder Utility, which tin can be easily disabled. i1Display Pro installs a daemon that is constantly running to discover if the sensor is continued, fifty-fifty when the software or tray utility are not in employ.
The latest i1Profiler version ane.6.ane has lots of bugs. For example, some of the ICC v4 profiles I generated looked muddy and with blocked shadows, while the same settings in earlier software versions worked only fine. In Firefox, using an ICC v4 display profile from i1Profiler results in corrupted colors for images tagged with ICC v4 profiles, while Spyder5 v4 profiles worked just fine. The i1Profiler Tray app doesn't run at all on my system running OS 10 Yosemite 10.x.3.
Hardware wise, both colorimeters offer comparable performance, with an border for i1Display Pro, especially on lower quality displays. Room lighting measurement is meliorate with the i1, exhibiting less interference from strong light sources and sensor positioning than Spyder5.
Measurement times with original software are comparable, but i1 is faster in dispcalGUI + Argyll CMS, which can be an advantage for some users, at to the lowest degree until Argyll CMS is optimized for the new Datacolor sensor.
i1Display Pro (EODIS3) currently retails less than the comparable Spyder5 Elite, making information technology a meliorate choice overall, in my stance.
Spyder5Pro vs. Colormunki Display
Colormunki Display compares directly to the Pro version of Spyder 5. It offers a improve sensor, but more limited software packet.
Colormunki Display (CMUNDIS) has a great sensor that offers the same calibration quality as i1Display Pro, but with longer measurements times and a simplified software design. Upgrades between both versions are not possible, but Colormunki is notwithstanding uniform with Argyll CMS and works great with information technology. Datacolor used to offer software upgrades in the past, merely this option is not currently available for Spyder5, and nosotros don't know if they have any plans for it in the future.
Software interface is beginner friendly, more akin to Spyder5Express, only it has an advanced fashion with more choices for gamma and white point, matching Spyder5Pro in that respect. It lacks the more than avant-garde display analysis features present in Spyder5Pro and the gamut comparing tool, which is really useful to catch any abnormalities with the generated profile.
Raw sensor performance is on par with i1Display Pro, meaning that it is a niggling improve than Spyder5. Both devices are and so close that at that place's not much to be said about it.
Sticking to the original software, Spyder5 Pro is a better deal than Colormunki Brandish. Information technology offers comparable profile quality, just better and less buggy software. If you want to piece of work with Argyll CMS, though, Colormunki Brandish is the best pick. It offers faster measurement times and slightly ameliorate profile quality.
Decision
Since sensor performance is comparable, it all boils down to the software features offered at each price point.
Spyder5Express is hard to beat at its price. No colorimeter from any other manufacturer, including the X-Rite Colormunki Smile (seems to be a reworked Eye One Display ii — old engineering science), tin can compete with it on pure sensor performance. Using information technology with the complimentary dispcalGUI + Argyll CMS package removes all software limitations and provides a quality calibration solution from beginner to advanced users.
Datacolor's Spyder 5 Express is an unbeatable value, specially if paired with the open source dispcalGUI and Argyll CMS software.
At an intermediate price point, Spyder5Pro competes favorably with the X-Rite Colormunki Brandish, beating it on features, calibration speed and software quality, but losing a picayune scrap on raw sensor performance. The Colormunki Display is less expensive and works improve with Argyll CMS, though, making it a meliorate choice in my opinion.
The top of the line Spyder5Elite version is a tough sell. Ten-Rite's i1Display Pro offers comparable software features and slightly better sensor performance, defective only the multiple monitor tweaking features available in Spyder5. Information technology besides works faster with Argyll CMS and is compatible with nigh of the high finish displays that offer direct hardware calibration, in case y'all upgrade in the futurity. That would be my recommendation for high cease users.
Users of high end displays that support hardware scale — Eizo ColorEdge, NEC SpectraView Ii and Dell PremierColor, for case — should stick with the calibration devices that are directly supported past the manufacturer proprietary calibration software. Those closed solutions yield much better results past directly accessing and adjusting the hardware response, instead of only profiling information technology and adjusting the color response on the graphics card level. For most manufacturers, this means buying an i1Display Pro and their software package.
---
PS: What's with all those cryptic product names? Is information technology Spyder5 or Spyder 5, with a infinite? Why not Spyder 5 Elite, Pro and Express, instead of everything in all caps and without whatever spaces? 10-Rite is likewise guilty: i1Profiler instead of i1 Profiler, i1Display Pro instead of the more natural i1 Display Pro. How can color management be simpler if the product names themselves sound complicated?
---
Datacolor Spyder 5 Elite Software Download
DOWNLOAD HERE
Source: https://cameratico.com/articles/datacolor-spyder-5-review/
Posted by: harrisunwhan.blogspot.com